How to Stain Vinyl Shutters
7 min read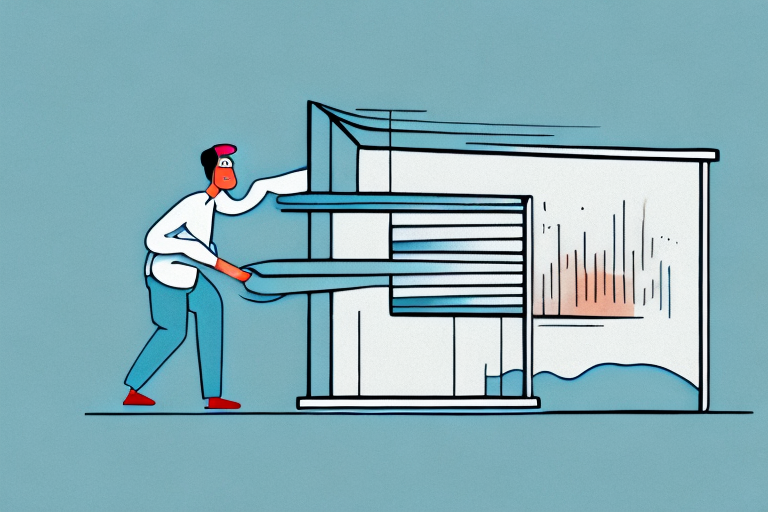
A person staining a set of vinyl shutters
Vinyl shutters are a popular option for homeowners who want a low-maintenance solution to providing privacy and security for their windows. Although vinyl shutters are designed to withstand harsh weather conditions with minimal upkeep, they can still begin to look faded and worn over time. The good news is that staining your vinyl shutters is a great way to refresh their appearance and keep them looking new for years to come.
Choosing the Right Stain for Your Vinyl Shutters
Before you start staining your vinyl shutters, it is important to choose the right type of stain. While most traditional wood stains can be used on vinyl shutters, it is recommended that you opt for a vinyl-specific stain for best results. This type of stain is made with a special formula that is designed to adhere to vinyl material and provide a long-lasting finish. You can choose from a variety of colors and finishes depending on your preference and the look you want to achieve.
It is also important to consider the climate and weather conditions in your area when choosing a stain for your vinyl shutters. If you live in an area with high humidity or extreme temperatures, it is recommended that you choose a stain that is specifically designed to withstand these conditions. Additionally, if your shutters are exposed to direct sunlight for extended periods of time, it is important to choose a stain that offers UV protection to prevent fading and discoloration over time.
Preparing Your Vinyl Shutters for Staining
To prepare your vinyl shutters for staining, you will need to first remove any dirt or debris from the surface. This can be done using a soft-bristle brush and a bucket of warm soapy water. Be sure to rinse the shutters thoroughly with clean water and allow them to dry completely before moving on to the next step.
Once your shutters are clean and dry, you may need to sand them lightly to create a surface that will better accept the stain. Use a fine-grit sandpaper and sand in the direction of the grain. After sanding, wipe the shutters down with a clean, damp cloth to remove any dust or debris. Now your vinyl shutters are ready for staining!
Cleaning and Sanding Your Vinyl Shutters
Once your shutters are clean and dry, you should lightly sand the surface with a fine-grit sandpaper to help the stain adhere better. Be careful not to sand too aggressively, as this can damage the surface of your shutters. Once you have sanded the shutters, wipe them down with a clean, dry cloth to remove any dust particles before moving on to the next step. If your shutters have any stains or marks that won’t come off with cleaning, you may need to use a vinyl cleaner or degreaser before sanding.
It is important to note that not all vinyl shutters can be sanded. Some shutters have a textured surface that can be damaged by sanding. Before attempting to sand your shutters, check with the manufacturer or consult a professional to ensure that sanding is safe for your specific type of shutters. Additionally, if you are unsure about how to properly clean or sand your shutters, it is always best to seek the advice of a professional to avoid causing any damage to your shutters.
Masking Off Areas You Don’t Want to Stain
Before you begin applying the stain to your vinyl shutters, you should mask off any areas that you don’t want to be stained, such as hinges or hardware. This can be done using painter’s tape or masking film. Make sure that you press the tape down firmly to ensure that no stain seepage occurs from underneath the tape.
It is also important to note that you should avoid staining your vinyl shutters on a windy day. Wind can cause the stain to spread to areas that you don’t want it to, even if you have masked them off. Additionally, make sure that you are working in a well-ventilated area and wearing protective gloves and eyewear to avoid any potential health hazards from the stain.
Applying the Stain to Your Vinyl Shutters
When applying the stain to your vinyl shutters, you have a few options. You can use a brush, roller, or sprayer depending on your preference, however, a brush is often the easiest and most precise method. Apply the stain in thin, even coats, making sure to cover all areas of the shutters. It is important not to apply the stain too thickly or it may not dry properly and peel off over time.
Additionally, it is recommended to apply the stain in a well-ventilated area to avoid inhaling any fumes. If you are using a sprayer, make sure to cover any nearby surfaces to prevent overspray. After applying the first coat, allow it to dry completely before applying a second coat if desired. Once the final coat is applied, allow the shutters to dry for at least 24 hours before handling or reinstalling them.
How to Achieve a Smooth and Even Finish
To achieve a smooth and even finish on your vinyl shutters, it is important to work quickly and efficiently while applying the stain. Be sure to use long, even strokes to apply the stain, and avoid going over areas that have already been stained. Keep a wet edge as you work, to prevent any lap marks or inconsistencies from forming.
Additionally, it is important to properly prepare the surface of the shutters before applying the stain. Clean the shutters thoroughly and allow them to dry completely before beginning the staining process. Any dirt or debris left on the surface can cause the stain to adhere unevenly or create blemishes in the finish. Taking the time to properly prepare the surface will ensure a smooth and even finish that will last for years to come.
Drying Time and Curing Process for Stained Vinyl Shutters
The drying time for your vinyl shutters will depend on the type of stain you have used and the weather conditions in your area. Generally, you should allow the shutters to dry for at least 24 hours before handling them again. However, it may take up to 48 hours for the stain to completely cure, so avoid washing or exposing the shutters to moisture during this time.
It is important to note that the curing process for stained vinyl shutters can be affected by the temperature and humidity levels in your area. If the weather is particularly humid, it may take longer for the stain to cure. In addition, if the temperature is too low, the curing process may be slowed down. To ensure the best results, it is recommended to stain your shutters when the weather is dry and mild, with temperatures between 50-80 degrees Fahrenheit and humidity levels below 70 percent.
Tips for Maintaining the Stained Finish on Your Vinyl Shutters
To maintain the stained finish on your vinyl shutters, it is important to keep them clean and free of debris. This can be done using a soft-bristle brush and warm soapy water. Avoid using harsh chemicals or abrasive cleaning tools as this can damage the stain. Additionally, you may need to reapply the stain every few years depending on the amount of exposure to sunlight and weather conditions in your area.
Another important tip for maintaining the stained finish on your vinyl shutters is to regularly inspect them for any signs of damage or wear. If you notice any cracks, chips, or fading, it is important to address these issues promptly to prevent further damage. You can touch up small areas of damage with a matching stain or paint, but for larger areas, it may be necessary to replace the entire shutter. By staying on top of maintenance and repairs, you can extend the life of your vinyl shutters and keep them looking beautiful for years to come.
Common Mistakes to Avoid When Staining Vinyl Shutters
When staining vinyl shutters, there are a few common mistakes that you should avoid. One of the most common mistakes is applying too much stain at once, which can result in an uneven or peeling finish. Another mistake is using the wrong type of stain, which may not adhere correctly to the vinyl material. Lastly, not properly preparing the surface of the shutters before staining can result in a poor finish. Be sure to follow the instructions carefully and take your time to ensure that you achieve the desired results.
In conclusion, staining your vinyl shutters is a great way to refresh their appearance and keep them looking new for years to come. With the right preparation and technique, you can achieve a beautiful and long-lasting finish on your shutters. By following the tips outlined in this article, you should be able to successfully stain your vinyl shutters and avoid common mistakes.
It is important to note that not all vinyl shutters can be stained. Some vinyl shutters are designed to be painted only, and attempting to stain them can result in a poor finish. Before starting your staining project, be sure to check with the manufacturer or consult a professional to ensure that your shutters are suitable for staining.
Additionally, it is recommended to use a high-quality stain and sealer combination product to ensure the best results. This will not only provide a beautiful finish but also protect your shutters from the elements and extend their lifespan. Remember to follow the manufacturer’s instructions for application and drying times to achieve the best results.


