How to Refinish Metal Shutters
9 min read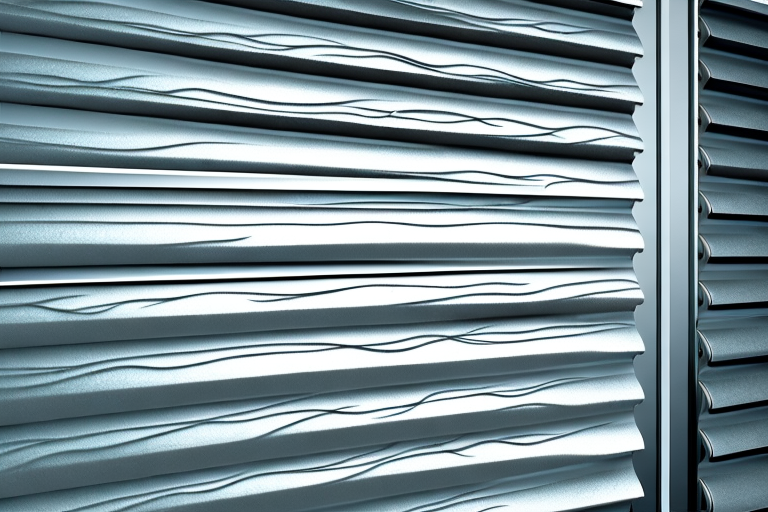
Metal shutters being refinished
Metal shutters are a durable and attractive feature on any home but after years of exposure to the elements, they may start to look worn and tired. Refinishing your metal shutters is a great way to give them a facelift and make them look brand new again.
Why Refinishing Metal Shutters is Beneficial
Refinishing your metal shutters not only improves their appearance and prolongs their lifespan, but it also helps to protect them against rust and corrosion. Refinishing also reduces the risk of structural damage, as compromised shutters may not be able to withstand harsh weather conditions.
In addition, refinishing your metal shutters can also increase the energy efficiency of your home. Over time, metal shutters can become worn and damaged, allowing air to leak in and out of your home. By refinishing them, you can ensure that they are properly sealed and functioning as they should, which can help to reduce your energy bills and make your home more comfortable.
Materials Needed for Refinishing Metal Shutters
The following materials are necessary for refinishing your metal shutters:
- Sandpaper (medium and fine grit)
- Primer
- Exterior paint in your desired color
- Paint brushes and/or a paint sprayer
- Drop cloths or plastic sheeting to protect nearby surfaces
- Masking tape to cover areas you don’t want to paint
- Clean rags or paper towels
- Bucket of soapy water
- Wire brush or steel wool
Before beginning the refinishing process, it is important to thoroughly clean the metal shutters. Use the bucket of soapy water and a clean rag or paper towel to remove any dirt, grime, or debris from the surface of the shutters. Once the shutters are clean, allow them to dry completely before proceeding.
When using a paint sprayer, it is important to wear protective gear such as a mask and goggles to avoid inhaling any paint particles. Additionally, make sure to work in a well-ventilated area to avoid any fumes from the paint. If using a paint brush, be sure to use long, even strokes to avoid any brush marks on the surface of the shutters.
Steps to Prepare Your Shutters for Refinishing
Before starting the refinishing process, it is essential to prepare your shutters by following these steps:
- Remove the shutters from their hinges (if possible).
- Wash the shutters thoroughly with soapy water to remove dirt and debris. Rinse with clean water and allow them to air dry completely.
- Use a wire brush or steel wool to remove any loose paint or rust. Sand any rough areas using medium-grit sandpaper.
- Use fine-grit sandpaper to smooth the surface of the shutters. Rubbing the surface with a clean rag will help remove any accumulated dirt.
- Cover any areas you don’t want to paint, using take, including the hinges and any decorative details. A masking film or painter’s tape will help to protect the surrounding areas from paint splatters.
Once you have completed the preparation steps, you can move on to the refinishing process. You can choose to paint or stain your shutters, depending on your preference. If you decide to paint, make sure to use a high-quality paint that is suitable for exterior use. Apply the paint in thin, even coats, and allow each coat to dry completely before applying the next one.
If you prefer to stain your shutters, choose a stain that is specifically designed for exterior use. Apply the stain using a brush or a rag, following the manufacturer’s instructions. Allow the stain to dry completely before applying a second coat, if necessary. Once you have finished refinishing your shutters, reattach them to their hinges and enjoy the refreshed look of your home’s exterior.
Sanding Techniques for Metal Shutters
When sanding your metal shutters, use a light touch and work in a circular motion. Take special care to sand any problem areas that may be prone to rust or corrosion. When finished sanding, wipe the surface down with a clean rag to remove any dust or debris.
It is important to note that before sanding your metal shutters, you should clean them thoroughly with soap and water to remove any dirt or grime. This will ensure that the sandpaper does not become clogged and that the surface is properly prepared for sanding. Additionally, it is recommended to wear protective gloves and a mask to avoid inhaling any dust particles during the sanding process.
Choosing the Right Primer for Your Metal Shutters
Ensure that you choose the right primer, as using an inappropriate primer could lead to problems such as peeling paint or rusting. Look for a primer designed specifically for metal surfaces.
When selecting a primer, consider the type of metal your shutters are made of. Different metals require different types of primers. For example, if your shutters are made of aluminum, you’ll need a primer that is compatible with aluminum surfaces. Additionally, make sure to properly prepare the surface before applying the primer. This includes cleaning the shutters thoroughly and removing any rust or old paint. By taking these steps, you can ensure that your metal shutters are properly primed and protected from the elements.
Applying the First Coat of Paint to Your Shutters
When painting your metal shutters, apply the first coat of primer using either a brush or a paint sprayer following the manufacturer’s instructions. If you’re using a paint sprayer, adjust the nozzle to give an even coat. Be sure to apply the first coat evenly, avoiding drips or lines. Allow the first coat to dry fully before moving to the next step.
It’s important to note that the type of primer you use will depend on the type of metal your shutters are made of. For example, if your shutters are made of aluminum, you’ll need to use a primer specifically designed for use on aluminum. This will ensure that the primer adheres properly and provides the best possible base for your paint. Check with your local hardware store or paint supplier for advice on the best primer to use for your specific type of metal shutters.
Tips for Applying the Second Coat of Paint
Once the first coat has dried, you can move on to applying the second coat of paint. Apply the coat in the direction of the shutter’s grain using the same technique as the first coat. A second coat provides better durability and enhances the appearance of the shutters. Avoid painting in direct sunlight and windy conditions, as this can cause uneven drying.
It is important to note that the drying time for the second coat may be longer than the first coat. This is because the second coat is thicker and takes longer to dry. Be patient and allow enough time for the second coat to dry completely before touching or handling the shutters. Additionally, if you notice any imperfections or missed spots after the second coat has dried, you can touch up those areas with a small brush or roller. This will ensure a smooth and even finish for your shutters.
The Importance of Proper Drying Time
Allow your newly painted shutters to dry for at least 24-48 hours before touching or rehanging. Rushing to rehang them too soon can result in damages to the surface.
It’s important to note that the drying time may vary depending on the type of paint and the weather conditions. In humid or cold weather, it may take longer for the paint to fully dry. It’s best to check the manufacturer’s instructions for specific drying times and to avoid any potential damage to your newly painted shutters.
How to Reinstall Your Refinished Shutters
Carefully reinstall the shutters once they have dried completely. Replace any damaged or missing screws or hinges. Check for proper alignment before tightening the screws.
It is important to note that if you have painted or stained your shutters, you should wait at least 24 hours before reinstalling them. This will ensure that the finish has fully cured and will not be damaged during the reinstallation process. Additionally, if you are unsure about how to properly reinstall your shutters, it is recommended that you consult a professional to avoid any potential damage to your shutters or your home.
How Often to Refinish Your Metal Shutters
Frequency depends on the climate. For areas with harsh climates, it’s best to refinish your shutters every three to four years, or when you notice signs of wear like strong corrosion
However, for areas with milder climates, you may only need to refinish your shutters every five to six years. It’s important to keep an eye on the condition of your shutters and address any issues promptly to prevent further damage.
When it comes to choosing a finish for your metal shutters, consider a powder-coated finish for added durability and protection against the elements. Powder coating creates a hard, smooth surface that resists chipping, scratching, and fading, making it a great option for shutters that are exposed to harsh weather conditions.
Common Mistakes to Avoid While Refinishing Metal Shutters
Common mistakes to avoid include failure to completely remove any existing chipping paint or rust, failing to prepare the surface for primer and paint, choosing the wrong type of primer or paint, or applying the coats too thickly.
Another common mistake to avoid is not allowing enough time for the primer and paint to dry between coats. Rushing the process can result in a less durable finish and may require additional touch-ups in the future.
It is also important to consider the weather conditions when refinishing metal shutters. Painting in high humidity or extreme temperatures can affect the drying time and overall quality of the finish. It is best to choose a day with mild weather and low humidity for optimal results.
Different Finishing Options for Your Metal Shutters
There are a variety of finishing options, including glossy, semi-gloss, matte, and satin finishes. The finish you choose should match the aesthetic of your home and your personal preference.
Glossy finishes are a popular choice for metal shutters as they provide a shiny and reflective surface. This finish is ideal for modern homes with a sleek and contemporary design. However, it is important to note that glossy finishes tend to show scratches and imperfections more easily than other finishes.
If you prefer a more subtle finish, a matte or satin finish may be a better option. These finishes have a low sheen and provide a smooth and even surface. They are also less likely to show imperfections and scratches, making them a practical choice for homes with children or pets.
Cost Comparison: DIY vs Professional Refinishing Services
Refinishing your metal shutters yourself can save you substantial amounts of money compared to hiring a professional refinishing service. The amount of money you save will vary depending on the size of your home and the number of shutters that need refinishing.
Refinishing your metal shutters is a significant upgrade to your home’s exterior appearance. Taking care in the preparation, priming, and painting process is well worth the effort. Follow these steps, and you will be able to successfully refinish your metal shutters, giving them a new lease of life and protecting them against future wear and tear.
However, it is important to note that DIY refinishing may not always be the best option. If you lack experience or the necessary tools, you may end up with a subpar finish that could end up costing you more in the long run. Additionally, professional refinishing services often come with warranties and guarantees, giving you peace of mind and protection against any future issues.
Another factor to consider is the time and effort required for DIY refinishing. Depending on the size of your home and the number of shutters, the process could take several days or even weeks to complete. Hiring a professional service can save you time and allow you to focus on other important tasks, while still achieving a high-quality finish for your shutters.


